Images are the bread and butter of making your blog posts and content pages presentable. However, it’s a well-known fact that WordPress itself does not provide the means to optimize images. And unless you find a way to do it yourself, you’re risking losing site performance.
More importantly, unoptimized images can have detrimental effects not just on performance, but also SEO. In recent news, Google has confirmed that it has rolled out the Page Experience update for both Mobile and Desktop websites. What this means for you as a WordPress user is that this is the best time to invest in performance optimization. And images are typically one of the main bottlenecks when it comes to Core Web Vitals metrics.
Let’s start with the basics.
Why should you optimize images in the first place?
It’s rare to see a blog post or an article published without the inclusion of images. Think of featured images, infographics, personal photos, travel photos, informative images, etc. Publishing photos with your blog posts is the modern standard of blogging.
But, unless those images are optimized – they can start slowing down your site substantially.
Let’s take a look at some research.
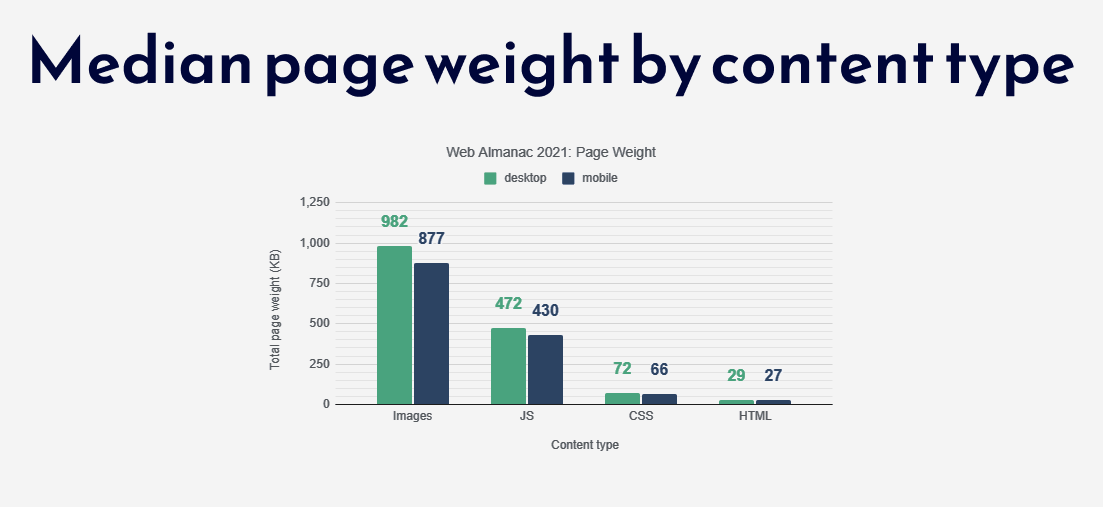
First off, according to the annual Web Almanac report (2021) – the average page weight for Desktop sites is 8.1MB and 6.9MB for Mobile. And a closer look reveals that Images (almost 1MB on average) and JavaScript (400kb on average) are the main contributors to such large page sizes.
This has been an upwards trend for more than ten years. But, how important is it to optimize your images?
Well, we know that Google considers Page Speed as a ranking factor. In other words, if your site is loading slow – Google will consider your site to be of lower quality than those that do optimize their website for performance.
Also, you have to consider your actual site readers. If they land on your pages or blog posts and the site is loading slow, there’s quite a good chance they will close the tab and go to the next site. I’m sure you have done this yourself in the past, a lot of people do.
By optimizing your images you can shave off as much as 70% of the original file size, depending on the image type. 300kb image compressed into 70kb’s makes a huge impact on site performance.
So, to summarize, here are the benefits of optimizing images:
- A smaller image size means faster website load time.
- Improves user experience.
- Has benefits for SEO (confirmed by Google).
- Less disk space usage on your hosting account.
And, best of all, you get all of these benefits without compromising image quality.
How to test your site performance
Before we dive deeper into image optimization, let’s talk about site performance tests.
There are quite a few tools for the job, including Google’s official PageSpeed Insights, but I also like using GTmetrix because it provides quite a lot of recommendations.

How to use GTmetrix:
- Open the GTmetrix website.
- Enter your website URL.
- Click on the “Test your site” button.
- Wait for results to render.
Once the results are rendered, you will see a page that looks like this:
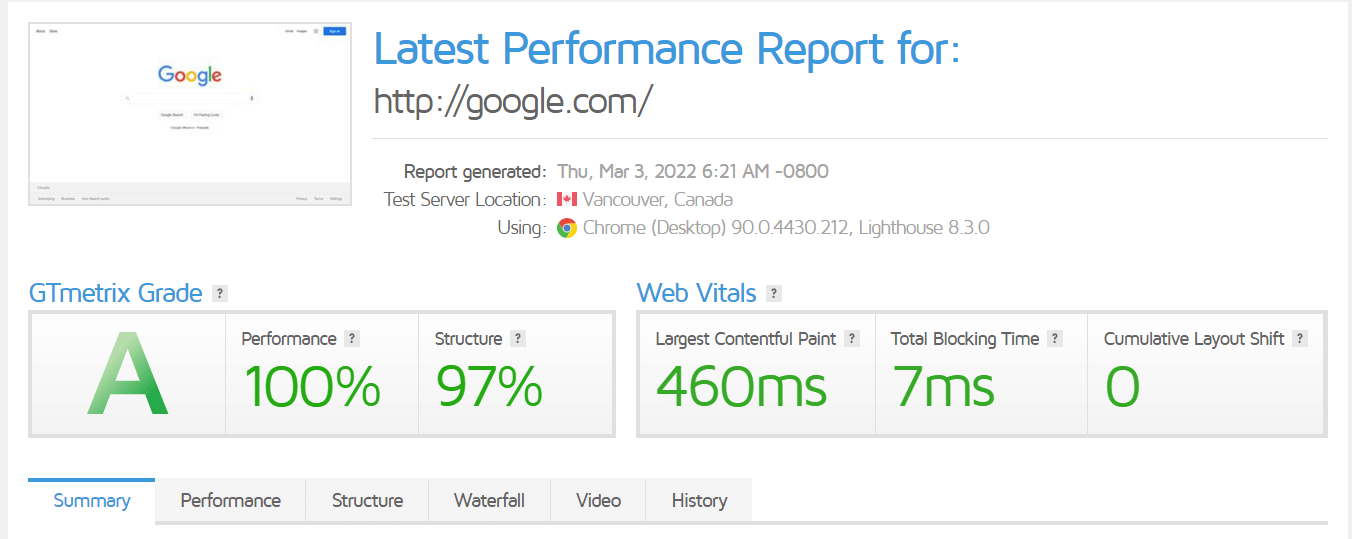
On this page, you will get various reports on how well your pages are performing in terms of site speed. But, specifically, you want to check the Structure tab which gives information on specific issues.
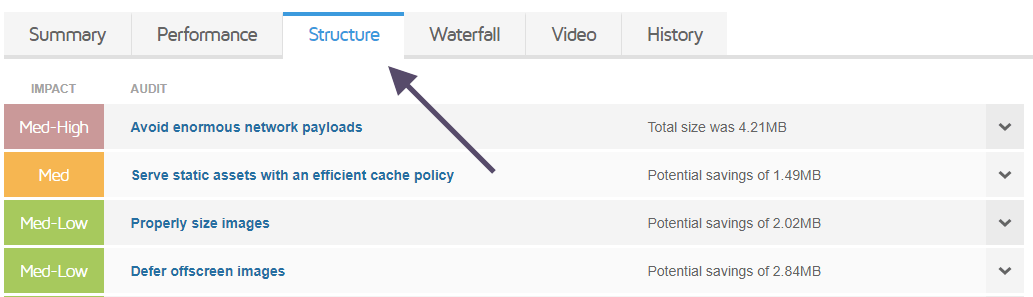
I wouldn’t worry about fixing all of the issues listed on this tab, however, do pay attention to ones related to images. Specifically:
- Are your images properly sized?
- Are you deferring images using lazy-load?
Lazy loading is a concept where an image is shown to the visitor only when it comes into the browser view. If you’re using modern WordPress themes, you might have this feature enabled by default.
Otherwise, any popular WordPress caching plugin will do the trick.
Should you use the WebP image format?
One of the recommendations you might see on the GTmetrix report is to serve images in next-gen format.
This refers to the usage of image formats like WebP and AVIF.
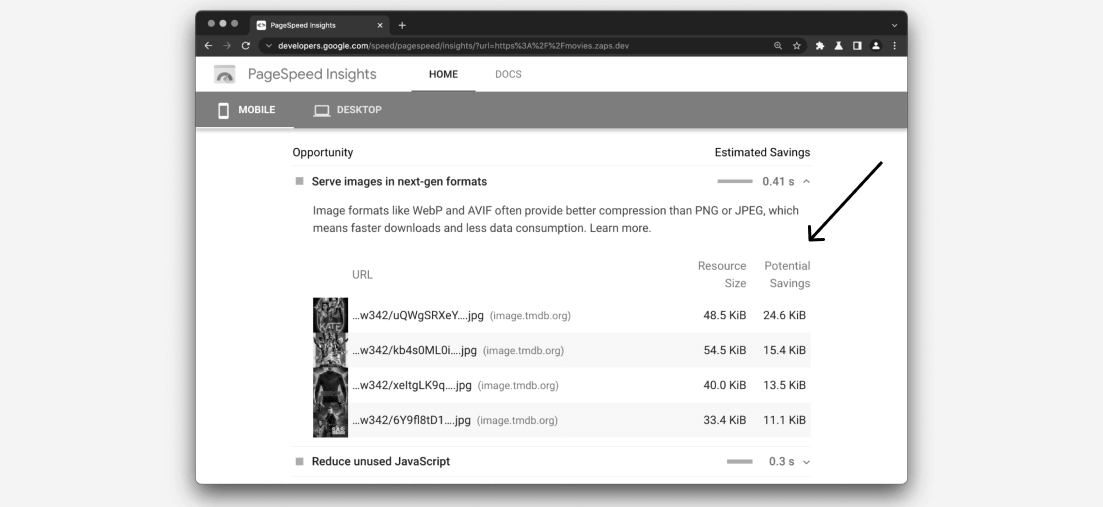
While it’s true that next-gen image formats provide better compression, there hasn’t been major adoption.
And it’s for two reasons:
- Next-gen formats mean you have to convert images (cameras don’t shoot in WebP).
- Maintenance is a lot harder if you want to export converted images to showcase elsewhere.
The fact of the matter is, you can achieve fairly good compression with traditional JPEG and PNG formats. And, it’s unlikely that things will change in the foreseeable future. One scenario in which you can use only next-gen formats is if you publish only digital photos.
Note: We have heard rumours that the WordPress performance team is going to be adding native WebP support in the near future. This means whenever you upload a JPEG it will be automatically converted to WebP, also. But, for the time being, this feature is yet to be finalized.
Tools for Image Optimization
So, what kind of tools are WordPress bloggers using to compress their images? While there are tons of options out there, the most convenient way of compressing images is by doing it in the browser.
Here are our two recommendations.
TinyJPG (Browser)
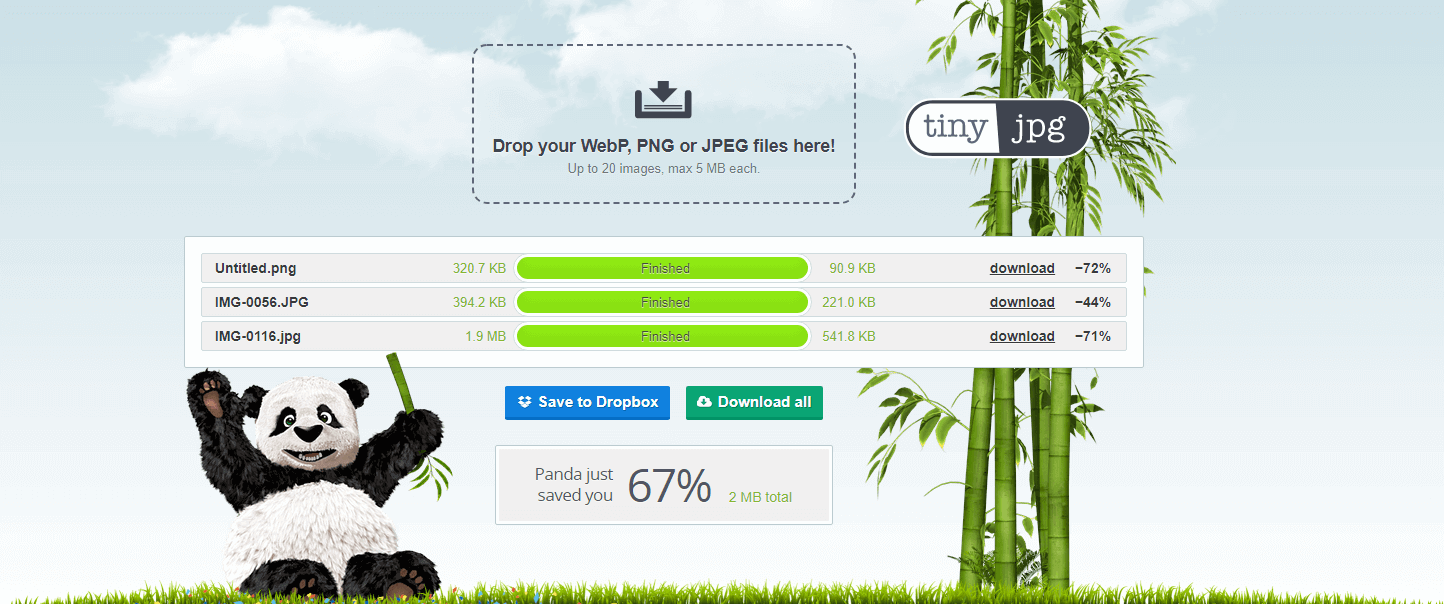
TinyJPG is one of the oldest running image compression tools. And, despite its popularity and ease of access – remains free to use. It can be used to compress an unlimited number of JPEG, PNG, and WebP images.
While the interface says there is a 20 image limit, you can bypass this by compressing your initial batch of photos, and then refreshing the page. One thing to note is that the upload limit for each image is 5MB – if your images are too large you can try and resize them to decrease the file size.
Compressor.io

The concept for Compressor.io is exactly the same as TinyJPG. The only difference is that you can upload files up to 10MB in size. But, also, compress image formats such as GIF and SVG.
In all fairness, just these two tools alone can solve the majority of your image compression needs. But, if you’re looking to automate things, then it’s worth looking into plugins.
WordPress Plugins for Image Optimization
Many bloggers will tell you WordPress is popular because it’s simple to use. I beg to differ. WordPress is largely popular because it makes themes and plugins extremely accessible. If you have a specific issue or want to add a unique feature – chances are someone has made a plugin for it.
As is the case for image optimization. Just by searching for the keyword from your WordPress plugins dashboard, you will get more than 100 choices for plugins that can automatically compress images. So, this section is going to be dedicated to a handful of those.
TinyJPG (Plugin)
We already looked at what TinyJPG can do from the browser. This however is their WordPress plugin which does the same exact job.
So, how does this plugin work?
Whenever you add new images to your Media Library (by uploading) the plugin will automatically compress them on the fly. In the settings panel, you can configure whether to compress images during upload or in the background. Additionally, you can select which sizes you wish to compress. Typically, you want to optimize the original image only.
Is this plugin free? Yes. In any given month, you can compress up to 500 images. This is why we recommend that you only compress the original image and not additional size types. However, even for medium-scale blogs – 500 images is a lot.
Download: wordpress.org/plugins/tiny-compress-images/
Smush
Smush image optimization plugin has been around for nearly a decade. It works like you would expect, from the Smush dashboard you can bulk-optimize your Media Library, with up to 50 photos at a time. But, specifically, Smush has some unique features that further improve the process of getting your photos optimized.
Features such as:
- Bulk optimization. You can optimize your images in batches of 50 photos per session.
- Image size management. Smush can automatically detect when an image is not appropriately sized. Eg. You’re using image dimensions that are not native to your theme.
- Lazy load. Adds native support for lazy loading photos if your theme doesn’t support it already.
Also, the plugin is free to use. The only limitation is that images cannot exceed 5MB in size. So, if you happen to upload really big photos – it’s probably best to use one of the other tools we mentioned earlier.
Download: wordpress.org/plugins/wp-smushit/
Lazy Load
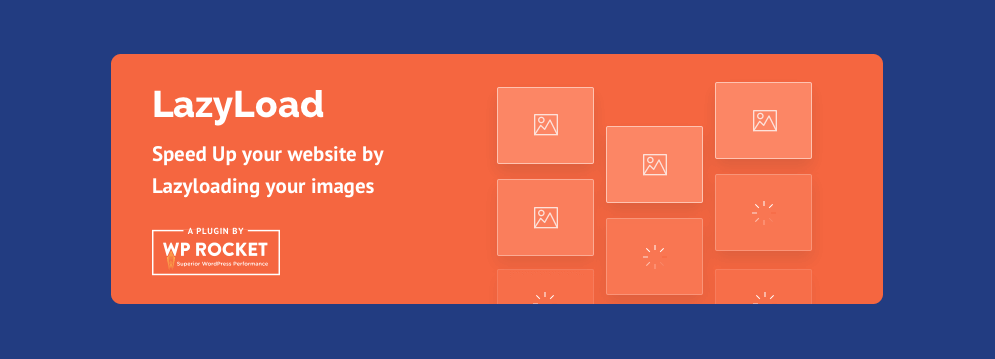
Lazy loading is a simple trick to avoid loading resources (such as photos) until they are required by the users viewport. For example, if your blog post has 2 images – one at the top and one at bottom – you can use lazy loading to prevent the browser from loading the bottom image until the user scrolls to the bottom of the page.
The end result for this is direct performance improvement. Since the user hasn’t yet scrolled that far, it is unnecessary to load the document until specifically requested. If you don’t have this feature already, you can use the LazyLoad plugin from WP Rocket. Completely free.
Download: wordpress.org/plugins/rocket-lazy-load/
Regenerate Thumbnails

The last plugin we want to highlight is Regenerate Thumbnails. The way that WordPress works is you have a select few thumbnail sizes. However, when you add new themes – those themes can sometimes add additional sizes, and suddenly your Media Library becomes littered with images that you will never use.
To fix this, the Regenerate Thumbnails plugin can check for which thumbnail sizes you have active on your site, and regenerate them accordingly. This is also a good solution to fix any images that aren’t being properly sized.
Download: wordpress.org/plugins/regenerate-thumbnails/
Conclusion
Even though WordPress is a very popular blogging platform, optimization is not its strongest point. As such, being mindful about optimizing your site through tools and plugins is essential.
Fortunately, it’s not so difficult to do it yourself. Many plugins can do a lot of the heavy lifting automatically. All you have to do is activate the specific plugin and forget about it. But, even then, it is recommended that from time to time you check your site performance using speed testing tools or similar solutions.
If you haven’t done it yet, you can also add your website to the Google Search Console. From the dashboard in GSC, you can get concrete reports on how well your site is doing in terms of Core Web Vitals metrics.